How do I sign in with a passkey?
Additional Information
| Before you start: You'll need to sign in once with your usual method (mobile, email or WhatsApp) before you can create a passkey. Your passkey is linked to that same sign-in, so you'll see the same profile, plans and payment methods. Use a device you own and keep secure, as anyone who can unlock that device may be able to use its passkey. |
Sign in to Payble in seconds using your face, fingerprint or device PIN. Once you've set up a passkey, you won't need to wait for a 6-digit code each time you sign in.
| What is a passkey? |
A passkey is a secure, password-free way to sign in. You don't have to remember a password or wait for a code. You just unlock your device the way you normally do, with your face, your fingerprint or your device PIN, and you're signed in.
Passkeys are supported by Apple, Google and Microsoft, and many banks and online services already use them. Here's why they're useful:
- Faster — sign in with a single tap or glance, with no codes to wait for or type in.
- More secure — a passkey can't be guessed, reused or stolen in a data breach.
- Private — your face scan or fingerprint never leaves your device. Payble and your council never see or store it.
- Stored on your device — your passkey is saved in your device's password manager (such as iCloud Keychain, Google Password Manager or Windows Hello). If that manager syncs, your passkey may also be available on your other devices.
How you confirm a passkey depends on the device you're using:
| Device | How you confirm it's you | Where the passkey is saved |
|---|---|---|
| iPhone or iPad | Face ID, Touch ID or device passcode | iCloud Keychain (Passwords app) |
| Android phone or tablet | Fingerprint, face unlock, PIN or pattern | Google Password Manager |
| Mac | Touch ID or your Mac password | iCloud Keychain (Passwords app) |
| Windows computer | Windows Hello: face, fingerprint or PIN | Windows Hello, or your browser's password manager |
| Tip: If you use a password manager like 1Password or Bitwarden, it may offer to save your passkey instead. Either option works. Just choose the one you'll have with you when you next sign in. |
| Phase 1 — Set up your passkey |
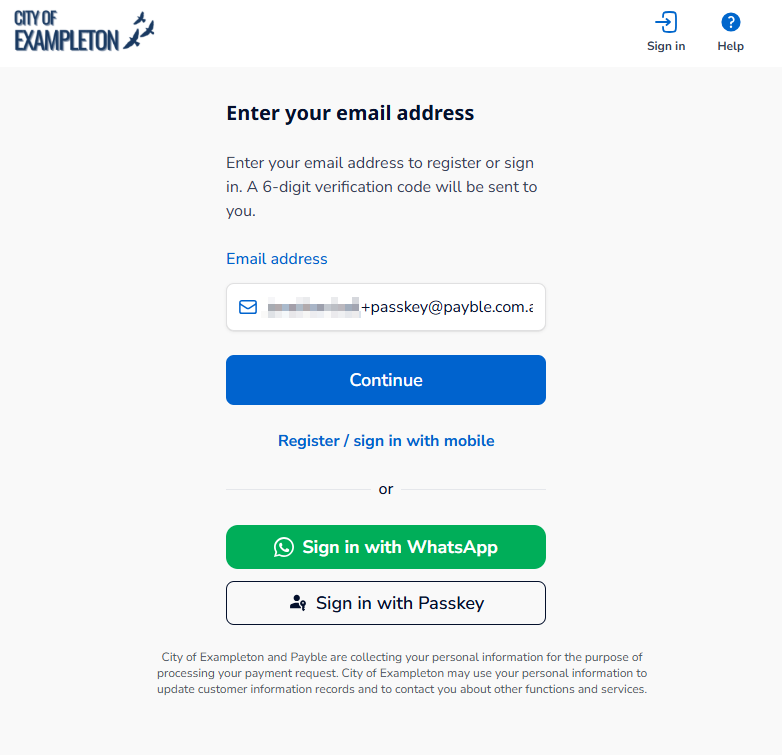
On the Payble sign-in screen, enter your mobile number, email address or WhatsApp number (if your council supports it), then click Continue.
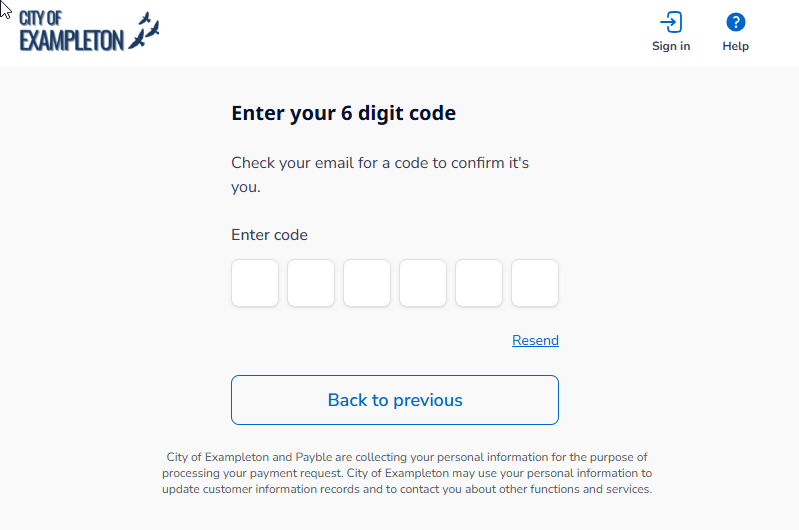
Enter the 6-digit code sent to your sign-in method. It should arrive within a few seconds.
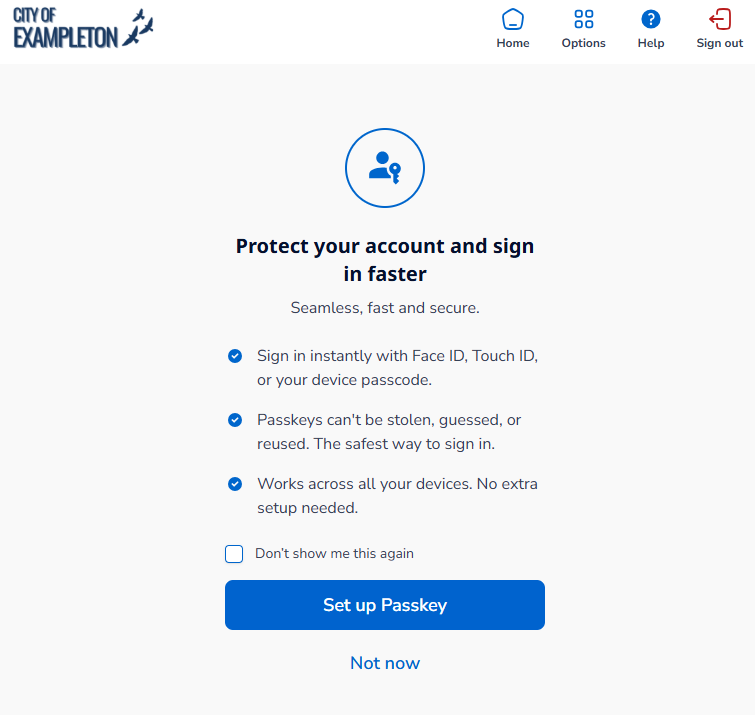
Next, Payble will prompt you to create a passkey. Click Set up Passkey, then follow the on-screen prompts from your device. Depending on your device, you'll be asked to confirm it's you with your face, fingerprint or device PIN, and to choose where to save the passkey. See the table in What is a passkey? for what to expect on your device.
That's it. Your passkey is now saved, and you can use it the next time you sign in to Payble.
| Phase 2 — Signing in with your passkey next time |
On the Payble sign-in screen, click Sign in with Passkey.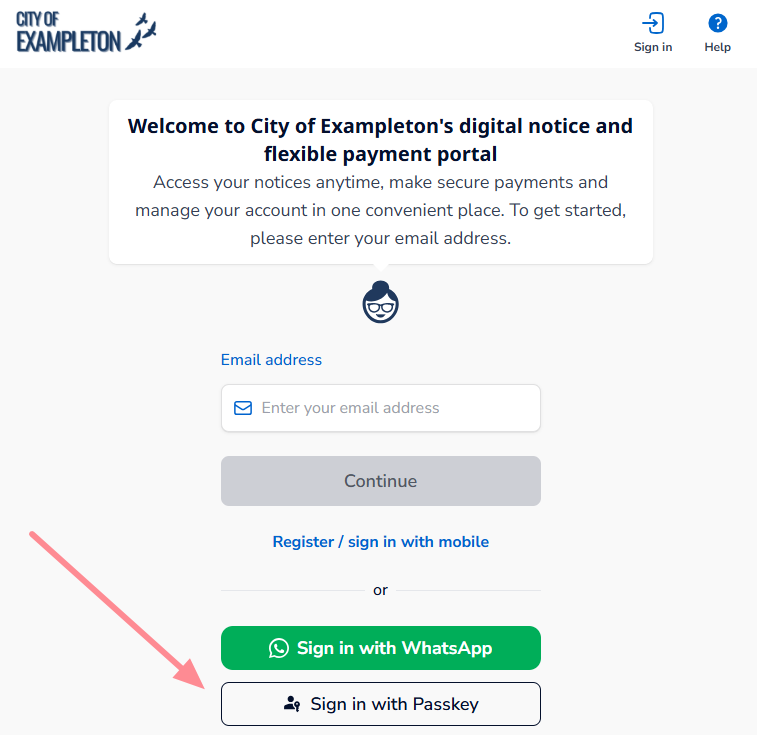
Your device will ask you to confirm your passkey with your face, fingerprint or device PIN.
Once it's confirmed, you're signed straight in to your Payble profile.
| Tip: Signing in on a new device, or one where your passkey isn't saved? Sign in with your usual mobile, email or WhatsApp code instead, and you can set up a passkey on that device too. |
Was this article helpful?
That’s Great!
Thank you for your feedback
Sorry! We couldn't be helpful
Thank you for your feedback
Feedback sent
We appreciate your effort and will try to fix the article